
An Even Better Granny Rectangle
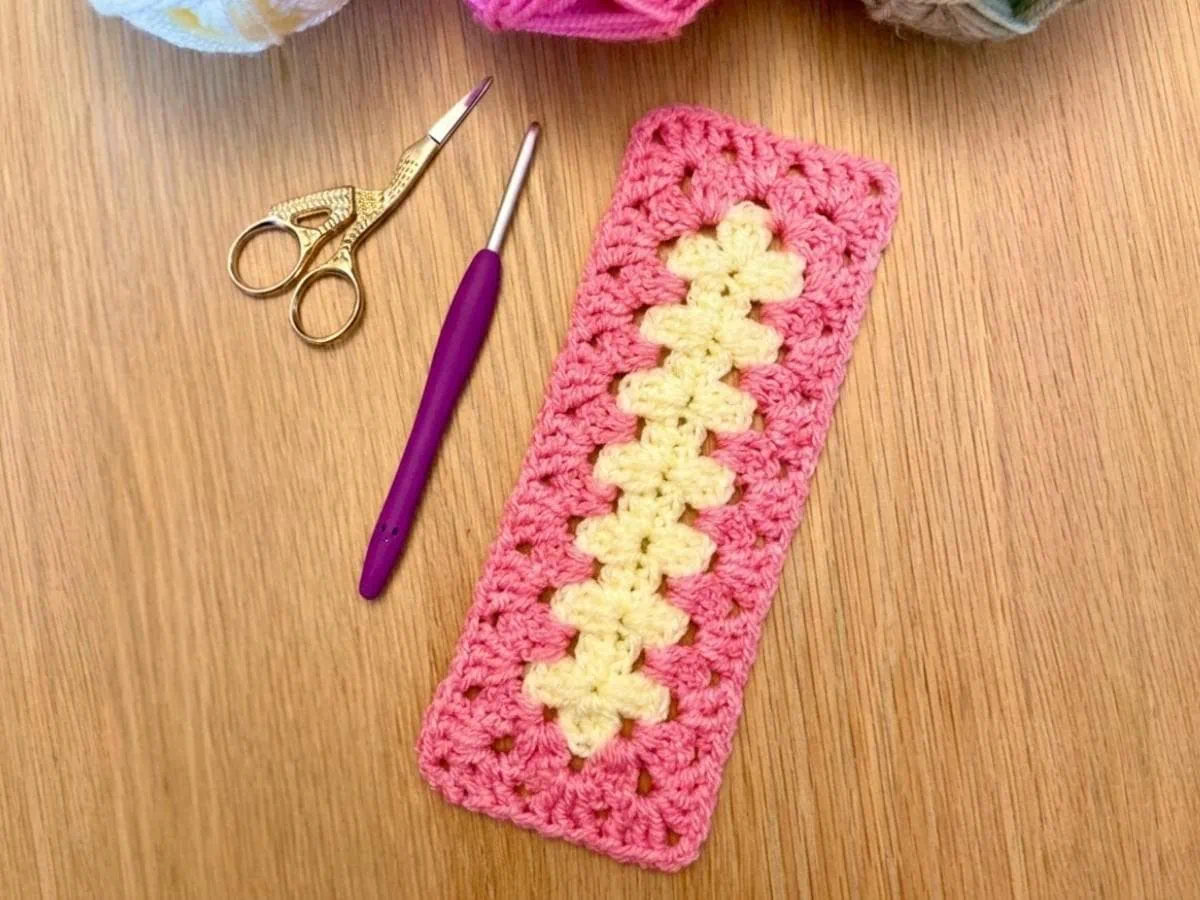
Three and a half years ago I came up with my Rectangle Granny pattern. I was really pleased with it…….but, now I think I have an ‘even better’ version.
The reason I say this is that my original version (left) had slightly bigger holes in the first round of treble clusters, which sometimes bothered me. With my ‘even better’ Granny Rectangle (right) I have tweaked things so that the holes around the first round of treble clusters are not so big.

Even Better Rectangle Original

In my original version the foundation of the rectangle was a row of double crochet (UK terms), and with my ‘even better’ version the foundation is 2 rows of double crochet.
If you’d like to try my original Rectangle Granny pattern, you can find the free tutorial here.
Instructions for the ‘even better’ Granny Rectangle can be found below.
Purchase an Ad- free PDF Version of this Pattern
An ad-free PDF version (digital download) of this pattern is available to buy now from Ravelry. The PDF is 16 pages long and has step-by-step progress photos (on pages 1-14) like the free version on my blog, it also includes just the written pattern (on pages 15-16) with no photos for those who do not want lots of photos to print out.
Video Tutorial for this Pattern
If you prefer to follow along visually, check out our step-by-step video showing exactly how to crochet the Granny Rectangle. Whether you’re a beginner or just love seeing the stitches in action, this video will guide you through the process from start to finish. Scroll down to watch the video towards the end of this page.
Pin for Later
Crochet Level
Easy
Crochet Skills Used
- A simple pattern which uses UK treble crochet, double crochet and chains.
- Knowledge of basic crochet stitches, techniques and terminology is assumed.
- Knowledge of how a Granny Square is made, including working in rounds.
- Working into chain spaces in the corners.
- Working into the ‘back bumps’ of a starting chain.
Abbreviations/Crochet terminology
UK terms are used throughout.
tr | Treble Crochet |
dc | Double Crochet |
ss | Slip stitch |
ch | Chain |
Beg-ch | Beginning chain |
st(s) | Stitch(es) |
sp(s) | Space(s) |
Treble Cluster | 3 treble crochet stitches worked in the same stitch or space |
[…] | Repeat pattern stated number of times |
(…) | Important notes |
*to* | Instructions between asterisks will be repeated as specified |
Stitch Guide/Conversion Guide
UK term | US term | Description |
|---|---|---|
Treble Crochet (tr) | Double Crochet (dc) | Yarn over hook. Insert hook into stitch, yarn over hook, pull through stitch (3 loops on hook), yarn over hook, pull through two loops (2 loops on hook), yarn over pull through remaining two loops to leave 1 loop on the hook |
Double Crochet (dc) | Single Crochet (sc) | Insert hook into stitch, yarn over hook, pull through stitch (2 loops on hook), yarn over hook, pull through remaining two loops to leave 1 loop on the hook |
Slip Stitch (ss) | Slip Stitch (ss) | Insert hook into stitch, yarn over hook, pull through stitch and through loop |
Chain (ch) | Chain (ch) | Yarn over hook, pull through loop |
Materials and Gauge
This pattern is suitable for any weight yarn and the corresponding crochethook. Gauge will depend on the yarn used. This sample used Paintbox Simply DK and a 4mm crochet hook.
Pattern Notes
This pattern uses UK terminology.
This is a photo heavy version of the ‘Even Better ‘Granny Rectangle pattern, with step-by-step progress photos. Please read through the notes and pattern thoroughly before starting. A video tutorial is available and can be found further down this post.
To achieve the rectangle shape the ‘Even Better’ Granny Rectangle starts with a foundation chain and 2 rows of UK double crochet (US single crochet). The pattern then switches to working in rounds and continues as a Granny Square would do.
The first row is double crochet worked in the ‘back bumps’ of the starting chain. If you turn the starting chain on its side you will see the ‘back bumps’. Working in the ‘back bumps’ gives a nicer finish, but it is not essential and you can opt to work into the chain stitches as you usually do instead.
The chain 2 at the start of round 1 is used instead of the usual chain 3 used to get up to the correct height for a row of treble clusters. This is because the round is worked into the first row of double crochet, skipping over the second row of double crochet.
Adapting the Length of the Rectangle
This pattern makes a base rectangle with 7 treble clusters on each long side and 1 treble cluster on each short side at the end of Round 1.

You may want to make a shorter or longer base rectangle for your project – this is really simple to do by adjusting the length of the starting chain. The starting chain should be a multiple of 3 + 2.
Further information on making a shorter or longer base rectangle is given at the end of this post.
Instructions
Foundation: Make a slip knot, chain 20 (a multiple of 3 +2) (fig 1).
Row 1: Work in the ‘back bumps’ for this row -shown in fig 2. 1dc in the 2nd ch from the hook, 1dc in each ch to the end of the row (fig 3). (19sts)
Row 2: Turn, ch1 (does not count as a st), 1dc in each st to the end (fig 3). (19sts)
Fig 1 Fig 2 Fig 3


Round 1
- Turn (fig 4)
- Ch2 (counts as 1tr). Note that a ch2 is used instead of the usual ch3 in this round
- only (fig 5).
Fig 4 Fig 5


- Work 2tr in the first st of row 1 (shown by the needle position in fig 6) – thismeans skipping over the row of dc just worked (row 2) and working into the first dc row (row 1) fig 7).
Fig 6 Fig 7


- Skip 2 sts, 3tr in next (continuing to work into row 1, skipping over row 2) (fig 8 and fig 9).
Fig 8 Fig 9


- Continue to [skip 2 sts, 3tr in the next] to the end, continuing to work into row 1 (fig 10).
- Ch2 (forms a corner), work 3tr into the same st as the last st of the row (needle position in fig 11 indicates where to insert sts).
Fig 10 Fig 11


- Ch2 (forms a corner), work 3tr in same sp (position is shown by needle in fig 12) (fig 13).
Fig 12 Fig 13


- Now work along the bottom, again working into the first row of dc (in the same sts worked previously) – skip 2 sts, 3tr in the next (fig 14).

- Skip 2 sts and work 3tr in the next (position shown in fig 15)
- Continue working [skip 2 sts, 3tr in the next] until the end of the row (fig 16).
Fig 15 Fig 16


- Ch2 (forms a corner), 3tr in the same st (fig 17) as the last 3tr. Ch2 (forms a corner) (fig 18).
Fig 17 Fig 18


- Ss in the top of the beg-ch2 worked at the start of the round (fig 19).
- Fasten off. (7 treble clusters along each long side and 1 treble cluster along each
- short side).

The base rectangle is now complete. Now you can add more rounds to your base rectangle in the same way that a Granny Square is worked.
Round 2
- Turn over and position the base rectangle so that the long sides are horizontal. Pull up a loop with a new colour in the top right ch2 corner sp. Ch3 (counts as 1tr) (fig 20).
- Work 2tr in the same sp (fig 21).
- You will now be working in the spaces between the treble clusters of the round below. Work 3tr in the next sp (indicated by the needle in fig 21).
Fig 20 Fig 21


- 3tr in each sp until the end (fig 22)

- Ch2 (forms a corner), work 3tr in the same sp as the last group of 3tr (fig 23).
- Work [3tr, ch2, 3tr] in the next corner sp (fig 24).
Fig 23 Fig 24


- Continue to work around the rectangle with 3tr in each sp and [3tr, ch2, 3tr] in each corner. On reaching the start of the round work [3tr, ch2] in the final corner sp, ss in the top of the beg-ch3. (fig 25).

Subsequent Rounds: Turn over. Pull up a loop in any ch2 corner sp. Ch3 (counts as 1tr), 2tr in same sp. Work 3tr in each sp between treble clusters along the side until you reach the corner, *[3tr, ch2, 3tr] in corner sp, work along next side with 3tr in each sp between treble clusters*, repeat from *to* until you reach the corner where you started the round, work [3tr, ch2] in the corner sp, ss in the top of the beg-ch3.
Continue to add more rounds until you have the desired size.

Video Tutorial
MAKING A LONGER OR SHORTER RECTANGLE
This pattern makes a base rectangle with 7 treble clusters on each long side and 1 treble cluster on each short side at the end of Round 1. This started with a chain of 20.
The pattern can be easily adapted to make a longer (ie. more treble clusters on the long sides) or a shorter (ie. less treble clusters on the long sides) rectangle.
The starting chain should always be a multiple of 3 + 2
In the example below the starting chain is 11 (ie. 9 +2) and gives 4 treble clusters along the long edge.

In the example below the starting chain is 29 (ie. 27+2) and gives 10 treble clusters along the long edge.

For ease, the table below shows starting chains for designs with 2 to 19 trebles on the long side of the rectangle.

You can see some projects that used the ‘Even Better’ Granny Rectangle below:

